Last night the moon put on a show for much of the world with a rare combination of two celestial events, a total lunar eclipse combined with a perigee moon. A total lunar eclipse turns the moon red due to light refraction from the earth’s atmosphere, thus the name “blood moon.”
A perigee moon is also known as a “super moon,” which is when the moon appears larger and brighter in the sky because its orbit is closest to earth.
Photographing a lunar eclipse is fun, though somewhat frustrating, experience. Here are some photo tips that I learned in the process.
Planning your shot
The key to great photos of the moon? Come up with a scene that you want to capture and then figure out where the moon will be to make that shot happen. In the case of an eclipse, you also have to plan your shot around the timing of the eclipse.
There are some handy technology tools that you can use to figure out where the moon will be. I used The Photographer’s Ephemeris to plan my shot last night, which provides an easy way to calculate where the moon will rise and how high above the horizon it will be, based on a shooting location that you choose.
I wanted to capture the lunar eclipse rising above Mt. Rainier, showing itself as close to the peak of the mountain as possible. The app showed a light blue line in the direction of the moon rise, which was almost due east last night.

I then scoped out some shooting locations with a Google image search, paying attention to the location mentioned in the shot. The app can give you the perfect location, but that does you no good if it is in the middle of a forest. I picked Clear Lake near Eatonville for my shot, which would give me the moon rising just left of the mountain, and was also pretty easy to get to.

The Photographer’s Ephermeris also allows you to calculate elevations relative to your position. In this case, I dropped the grey pin on the summit of Mt. Rainier, then moved the timeline of the moon until the darker grey line intersected with my location. You can see that I was 40km away from the summit and it was at an altitude of 5.3 degrees relative to me. When the moon was directly overhead, it would be an an altitude of 12 degrees.

My location wasn’t perfect. Ideally, I would have gone just a little further south to get the moon closer to the peak of the mountain, but the challenge is to identify a location with visibility and accessibility. If you use The Photographer’s Ephemeris in your shoots, make sure to read up on horizon and direction details that you need to take into account.
Composing your scene
Once I was at my shooting location, I used a second tool called Sun Surveyor on my iPhone to visualize exactly where the moon would rise and its arc through the sky.

I brought a couple of cameras and a few different lenses. I wanted to capture a time-lapse landscape view of Mt. Rainier with the moon, but I also wanted to zoom in close to get some detail shots of the moon.
When planning a time-lapse, be sure to account for the arc of the moon in your shot. You want the moon to be as large as possible, but you also don’t want it to quickly exit the frame.
A sturdy tripod is also essential. Unlike a regular full moon, which can be extremely bright, a lunar eclipse is going to require slower shutter speeds than is possible to hand-hold.
It also helps to set your focus on a distant object in the daylight, then turn off autofocus and leave the focus setting where it is. Unlike a full moon, your camera will likely not be able to focus on a lunar eclipse.
Adjust your exposure
Exposure settings for a lunar eclipse can be a little challenging. Last night in Seattle, the moonrise coincided with sunset, meaning that the lighting of the scene was rapidly changing. At the same time, the brightness of the moon also changes rapidly, often changing 5-7 stops in exposure as it passes through the phases of the eclipse.
To effectively capture a full lunar eclipse, you need to expose first for the brightness of the moon, otherwise details will get blown out. If you are trying to capture the surrounding landscape, you may need to take a second brighter exposure and combine the two shots in post-processing.

Due to the rapidly changing light, you will need to set Manual mode on the camera and adjust aperture, shutter speed and ISO as you go, paying attention to the resulting exposure to make sure you aren’t blowing out the highlights of the moon in the process.
Shutter speed is critical, and you don’t want to let the camera change it for you. The moon is moving relatively fast through the sky and if your shutter speed is too slow, the moon will come out blurry. The longer your zoom lens, the more noticeable this becomes. For example, at 70mm, I was getting acceptable photos up until about 6 seconds. At 300mm, the limit was about 2 seconds, and at 800mm, it needed to be less than a second.

Ideally, use the widest aperture possible for your lens to capture the most light at the fastest shutter speed. However, if you are trying to capture foreground details in your shot, you’ll want to stop down a bit to f/8 or so to keep the scene in focus.
To keep your shutter speed within limits, you’ll end up changing ISO as the eclipse progresses. You want to keep ISO as low as possible to reduce noise in your photos, but you need to boost as the scene gets darker. At sunset, I started at ISO 400, but during the middle of the eclipse when the moon was darkest, a setting of ISO 3200 gave better results.
Lessons learned
I got a few pictures from the lunar eclipse that I really like, but I made a bunch of mistakes that I’ll need to remember for the next time.
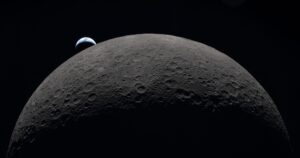
The biggest mistake I made was to take too many photos at longer shutter speeds. I was trying to keep my ISO low, but in the process, didn’t realize just how fast the moon was moving across the sky. A bunch of my moon photos were blurry like this one.

I also underestimated just how much the lighting would change and how quickly it would change. It pays to practice with your camera in manual mode and be able to tweak aperture, shutter speed and ISO as things change in the scene.
The next lunar eclipse doesn’t occur until 2018, so that gives me a couple of years to practice and improve.